Smart Ways to Make More Room in a small kitchen
A small kitchen can work surprisingly well when every tool has a logical home and the available space is used intentionally. You don’t always need a bigger footprint or an expensive remodel, often, you simply need better cabinet access, fewer duplicate items, and a layout tailored to how you actually cook.
Instead of trying to squeeze an organizer into every empty gap, start by evaluating the storage you already have. A few practical adjustments can make deep cabinets easier to reach, clear off crowded countertops, and turn awkward corners into reliable storage.
Table of Contents
Start With a Quick Inventory of Your Existing Space
Before buying a single bin or shelf riser, open your cabinets, pull out a few drawers, and inspect the spots you rarely touch. In many kitchens, the real issue isn’t a shortage of square footage, it’s wasted vertical height or items buried too deep to reach.
The National Kitchen & Bath Association (NKBA) classifies Kitchens under 150 square feet as small, yet thoughtful zoning can make a compact layout feel remarkably open. Start by dividing your existing storage into four clear zones:
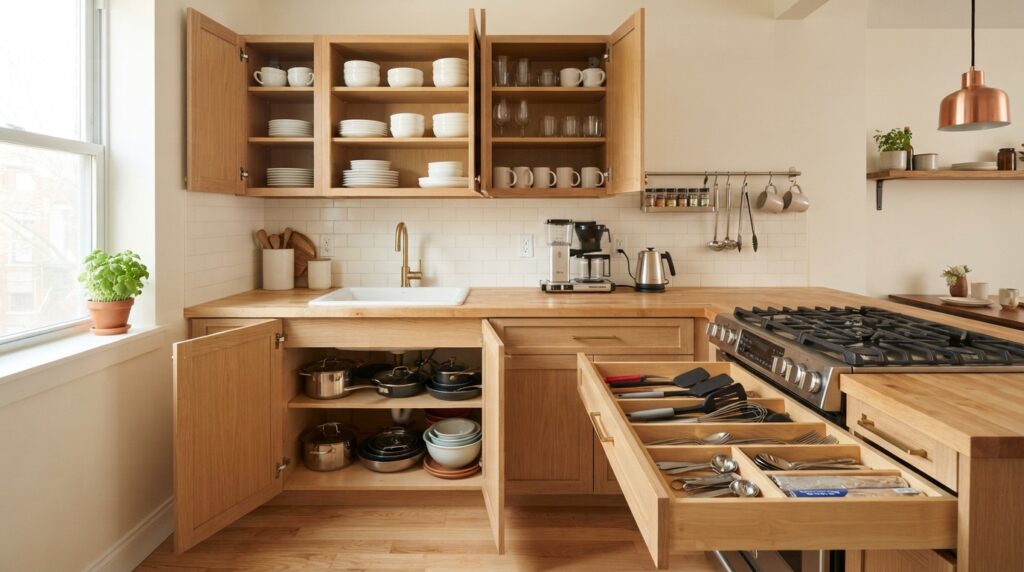
| Storage Zone | Best Items to Store Here | Organization Priority |
| Upper & Lower Cabinets | Everyday plates, bowls, glassware, pots, and heavy cookware | Keep daily dishes at eye or waist level; store bulky pots in accessible base cabinets |
| Drawers | Cooking utensils, flatware, measuring tools, and foil/wraps | Group by task near your prep counter or stove |
| Walls & Vertical Surfaces | Frequently used lightweight tools, spices, or mug rails | Keep selective so walls don’t look cluttered |
| Countertops | Only appliances used daily (such as a coffee maker or kettle) | Keep prep surfaces clear for chopping and plating |
Once you see how your current zones are divided, it becomes much easier to spot what is genuinely missing, and avoid buying organizers you don’t need.
Declutter Before Buying Any Organizers
It is tempting to buy matching bins before sorting through what you own, only to realize half the items you are organizing rarely get used. Clear out broken gadgets, expired pantry goods, and obvious duplicates first. Next, move seasonal or occasional gear, like roasting pans, specialty appliances, or extra serving platters, to higher shelves or less accessible cabinets so prime real estate stays open for everyday cooking.
Give Every Cabinet and Drawer a Clear Purpose
One of the fastest ways to make a small kitchen feel chaotic is storing similar items in three different places. Assigning each cabinet and drawer a single clear category keeps daily prep predictable:
- Keep Everyday Dishes Together: Store plates, bowls, and glasses in one cabinet near the dishwasher or sink for quick unloading.
- Group Cookware by the Stove: Keep skillets, saucepans, and lids in the lower cabinet closest to your cooktop.
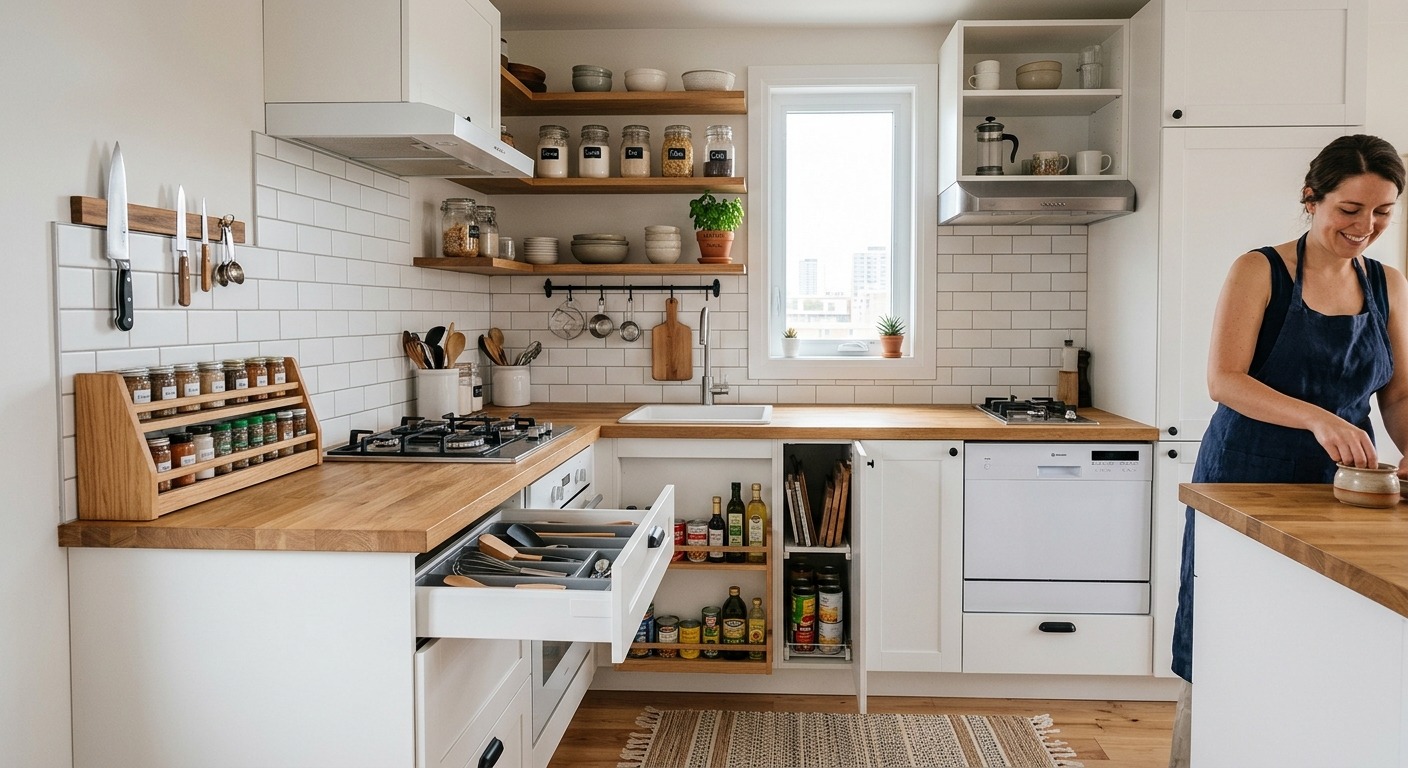
- Use Simple Drawer Dividers: Adjustable dividers keep spatulas, whisks, and knives separated without forcing everything into tiny, rigid compartments that waste space.
Make Deep Cabinets and Awkward Corners Easier to Reach
Deep base cabinets and blind corners often swallow mixing bowls and small appliances in the back, forcing you to unload half the shelf just to grab one item. In line with NKBA small-kitchen planning guidelines, retrofitting problem cabinets with targeted hardware solves access issues without expanding your kitchen:
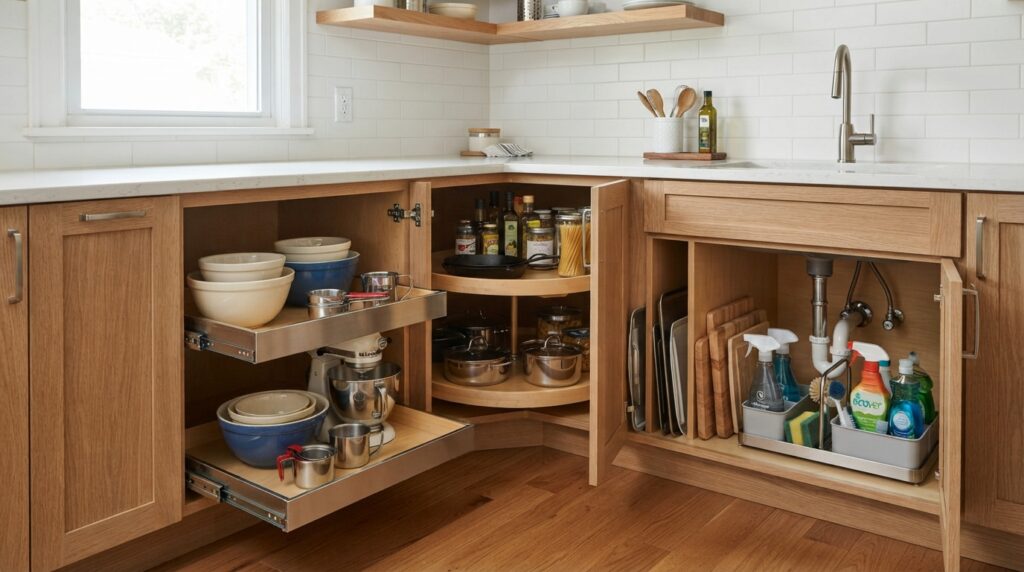
| Cabinet Challenge | Practical Storage Fix |
| Deep Base Cabinet | Install sliding pullout shelves so back items glide forward effortlessly |
| Blind Corner Cabinet | Add a rotating lazy Susan or swing-out corner insert |
| Tall, Narrow Cabinet | Use vertical tray dividers for baking sheets, cutting boards, and platters |
| Crowded Under-Sink Area | Group cleaning sprays and sponges in removable plastic caddies around plumbing pipes |
Still, you don’t need custom hardware for every cabinet, sometimes simply moving everyday items to the front row and placing rarely used gear behind them is enough.
Use Vertical Height and Cabinet Doors Selectively
When floor space is tight, look upward. Tall pantry cabinets, narrow vertical shelving, and wall-mounted rails free up counters without crowding your workspace. Just avoid covering every bare wall with open racks, which can quickly make a compact room feel visually cramped.
The inside of cabinet doors also offers valuable flat real estate for lightweight items, provided you measure carefully first so shelves still allow the door to close cleanly:
- Pantry or Upper Cabinet Doors: Slim spice racks or narrow packet holders.
- Under-Sink Cabinet Doors: Over-the-door caddies for dish brushes, sponges, or trash bag rolls.
- Base Cabinet Doors: Thin racks for pot lids, cutting boards, or foil boxes.
Build a Functional Pantry Without a Dedicated Closet
Not every home has room for a walk-in pantry, but a tall cabinet or deep shelving unit can handle dry goods just as effectively. According to NKBA storage recommendations, high pantry cabinets, pullout drawers, and tilt-out bins help keep ingredients visible so cans and jars don’t get lost in the back. Grouping dry goods by category, such as grains, baking supplies, and canned foods, prevents duplicate grocery purchases and keeps shelves tidy.
Keep Countertops and Open Shelves Under Control
Counter space disappears fast once small appliances and utensil crocks take over. Keep only the appliances you use every single day on the counter, and tuck blenders, toasters, or stand mixers into a cabinet if they only come out once or twice a week.
Similarly, if you use open shelving or glass-front cabinets to give the room a lighter, more spacious feel, keep the contents intentional. Stick to neatly stacked everyday dishes or glassware rather than miscellaneous jars and mismatched mugs, which quickly turn open storage into visual clutter.
Organize Around How You Move While Cooking
Where you store your tools matters just as much as how neatly they are stacked. Following the NKBA principle of activity centers, keeping items right where you use them, cuts down on unnecessary steps during meal prep:
- Store knives, cutting boards, and mixing bowls right beside your main prep counter.
- Keep cooking oils, salt, wooden spoons, and frying pans within arm’s reach of the stove.
- Keep food-storage containers and wraps near the counter where you pack leftovers.
Choose adjustable shelves and movable dividers whenever possible so your layout can adapt easily as your cookware or cooking habits change.
Use Often-Overlooked “Dead Zones” Around Appliances
Even in a compact kitchen, several inches of usable space often sit empty around large appliances. Putting those narrow gaps to work adds storage without crowding your walking path:
- The Gap Next to the Refrigerator: A slim 6- to 10-inch rolling utility cart slides neatly between the fridge and the wall or counter, creating an instant pullout pantry for spices, canned goods, cooking oils, and wraps.
- The Space Above the Refrigerator: Instead of letting cereal boxes and miscellaneous bags pile up loosely above the fridge, add a deep woven basket or clear handled bin for lightweight, infrequently used items like paper towels, picnic supplies, or seasonal baking pans.
- Toe-Kick Drawers Under Base Cabinets: The 3- to 4-inch recessed space at the very bottom of lower cabinets, known as the toe-kick, can be fitted with shallow flush drawers ideal for flat baking sheets, cooling racks, placemats, or extra cutting boards.
- Over-the-Sink Prep Boards: If your counter space between the stove and sink is only a foot wide, a fitted cutting board or roll-up stainless steel drying rack that sits directly over half the sink instantly creates a sturdy prep or draining zone.
Switch to Stackable, Uniform Food Containers
Round bowls, half-empty cereal boxes, and bulky original packaging waste up to 30% of cabinet and refrigerator shelf space because they leave awkward empty gaps around their edges. Replacing mismatched packaging with modular, straight-sided containers changes how much a single shelf can hold:
- Square and Rectangular Dry-Goods Bins: Straight edges sit flush against one another on pantry shelves, eliminating dead air between jars. Clear canisters also let you see how much rice, flour, or pasta is left at a glance.
- Nesting Glass Prep and Leftover Bowls: Choose food-storage sets where empty bowls nest inside each other and all lids snap together in one stack, preventing the classic avalanche of loose plastic lids every time you open a cabinet.
- Tiered Shelf Risers for Cans and Spices: Adding a simple two- or three-tier step riser inside a standard upper cabinet lets you read labels in the back row without lifting the cans in front.
Use Lighting and Visual Tricks to Make a Small Kitchen Feel Larger
Good storage keeps clutter out of sight, while smart visual choices keep a compact kitchen from feeling dark or boxed in:
- Add Under-Cabinet LED Strip Lighting: Shadows cast by upper cabinets make countertops feel smaller and harder to work on. Slim, rechargeable or plug-in LED light bars mounted under upper cabinets brighten prep zones and visually push the walls outward.
- Keep Countertop Colors Calm and Cohesive: Using matching wood or neutral canisters for everyday essentials, and tucking brightly colored packaging behind closed doors, reduces visual noise so the room feels calmer and more open.
- Choose Compact, Multi-Purpose Cookware: In a small kitchen, cookware with detachable handles or nesting profiles lets a full 8- to 10-piece set fit inside a single deep drawer, freeing an entire lower cabinet for small appliances.
Common Small-Kitchen Organization Mistakes to Avoid
Even well-intentioned upgrades can backfire if they add friction to your daily routine. Watch out for these four common pitfalls:
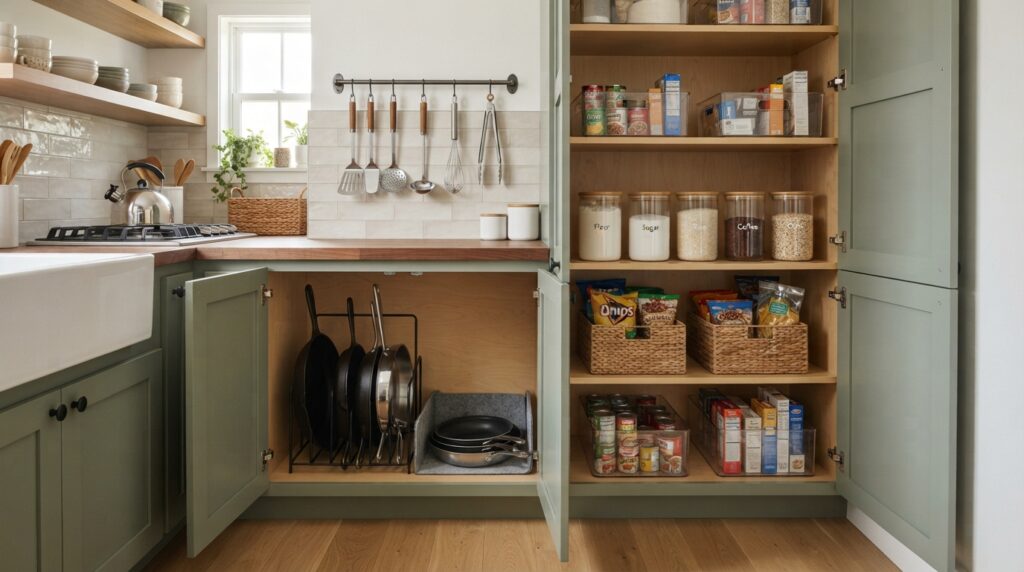
| Common Mistake | Why It Backfires | Better Alternative |
| Buying Containers Before Measuring | Bins that are half an inch too deep prevent cabinet doors from closing properly | Measure interior shelf width, depth, and height, including door hinges, before shopping |
| Overloading Magnetic Knife Strips and Wall Rails | Crowded walls create visual clutter and make grabbing one tool awkward | Limit wall rails to the 4 or 5 tools you reach for every single day |
| Decanting Every Single Pantry Item | Pouring every snack bag into jars creates extra dishes and leaves partial leftovers homeless | Decant only staples you buy regularly (flour, sugar, rice, coffee, oats) |
| Stacking Heavy Pots Without Dividers | Unstacking four heavy skillets just to reach the bottom pan discourages cooking and scratches coatings | Use vertical pan racks or felt protectors and keep only your 2 or 3 daily pans stacked |
Finish With a Quick Four-Question Storage Audit
Once you finish reorganizing, open your cabinets, check your drawers, and scan your countertops with four practical questions in mind:
- Can I find everyday tools within seconds?
- Can I reach what I need without moving three other items out of the way?
- Does every category of cookware and food have one clear home?
- Are my main prep counters clear enough to cook comfortably?
If the answer to any of these is no, adjust the placement before buying another storage product. Smart small-kitchen organization isn’t about packing belongings into every corner, it is about removing what you don’t need, improving access to what you use, and letting your existing space work effortlessly every day.