How to Fix Wasted Kitchen Cabinet Space for Under $500
You do not need brand-new cabinets to get a Kitchen that works properly. With a few targeted interior upgrades like pull-out shelves, drawer dividers, door-mounted racks, and vertical tray dividers, you can overhaul your existing storage for under $500 total and without hiring a contractor.
After years of Organizing Kitchens for rental property owners and busy families, I keep seeing the exact same problem. Homeowners assume their kitchen is too small when the real culprit is dead air inside deep boxes and poorly divided drawers. Fix the layout behind the doors, and the whole room suddenly feels twice as spacious.
Table of Contents
Why Wasted Cabinet Space Slows You Down Every Day
Behavioral studies on home kitchens show that people lose hours every month just hunting for buried cookware, lids, and pantry staples. At the same time, renovation surveys from the National Kitchen & Bath Association consistently rank storage capacity near the top of homeowners’ wish lists.
Good interior storage is the backbone of a functional kitchen. The first time I retrofitted a client’s awkward corner cabinet with a sturdy lazy Susan, she called me a week later half-annoyed that she had put up with the old setup for eight years. That is how noticeable the upgrade feels the very first time you cook dinner. My advice to anyone considering a remodel is simple: fix the insides of your cabinets first. Half of the “we need more storage” complaints vanish after a $200 weekend project.
Start With a Full Cabinet Audit
Before buying a single bin or rack, empty every cabinet onto your counters and Kitchen Table. Seeing everything in the daylight is the only way to catch duplicates and dead weight. Sort your items into four clear groups: daily essentials that belong at waist and chest height, weekly items for the upper or lower shelves, occasional pieces like holiday roasting pans that can live up high, and unused gear you should donate right away.
When I ran this exact audit on my own kitchen last month, I found three identical spatulas and a fondue pot I had not touched since moving in. Most kitchens carry 20 to 30 percent clutter that never sees the stove, and clearing it out creates shelf space you did not know you had.
One mistake that cost me two hours early on was measuring the outside of the cabinet boxes instead of the interiors. Face frames and door hinges eat up 2 to 3 inches on each side, so always buy organizers based strictly on the interior width, depth, and height.
Upgrade Deep Base Cabinets With Pull-Out Shelves
Deep lower cabinets are notorious for swallowing heavy pots and canned goods. Anything pushed behind the front row disappears until you get down on your hands and knees with a flashlight. Slide-out wooden or wire trays turn those dark caves into smooth-gliding drawers, and standard retrofit kits make this a straightforward DIY job.
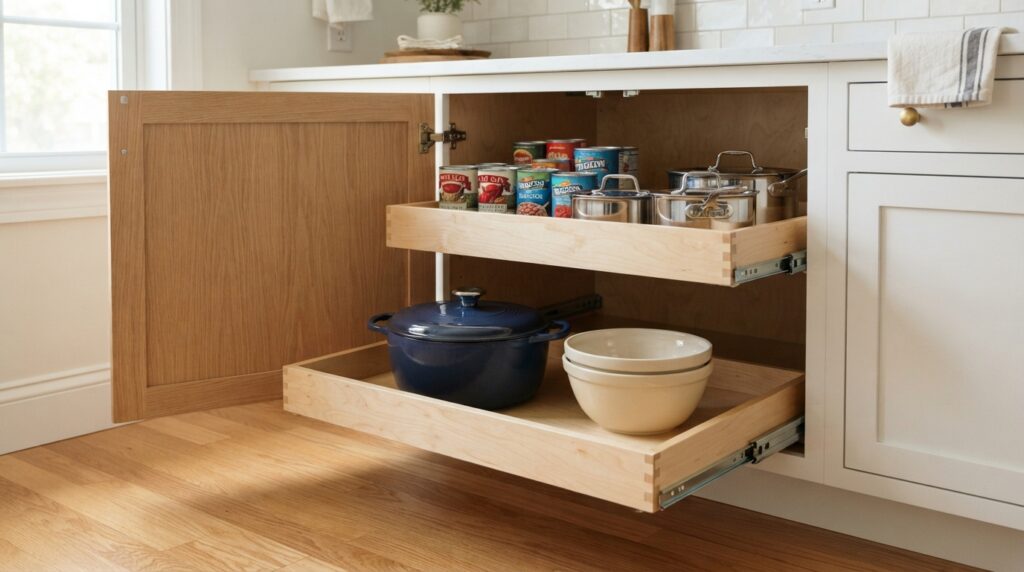
Basic sliding wire baskets run about $25 to $60 each and install in minutes, while sturdier wooden roll-out shelf kits cost between $30 and $80 per shelf and make a massive difference in daily usability. If you prefer custom full-cabinet pull-out systems installed by a carpenter, expect to pay $150 to $400 per cabinet.
We completed a full lower-cabinet conversion over a single weekend following a simple routine. On Saturday morning, we measured the interior width, depth, and height of every base box, accounting for hinge clearance. Saturday afternoon went to picking up roll-out kits sized to those exact numbers, and by Sunday afternoon, the rails were mounted and the shelves were reloaded by category. The whole kitchen cost around $350, and nothing ever gets lost in the back again.
One detail people miss when ordering pull-out shelves is the clearance around the door hinges and drawer fronts. If a shelf sits too close to the front edge of the cabinet, it can catch on a hinge when you pull it out or prevent the outer cabinet door from closing all the way. Always test how far the door swings open and check for any lip or trim along the front frame before screwing in your side rails.
One hard-earned warning: skip the budget drawer slides if you plan to store cast-iron Dutch ovens or heavy mixing bowls. Spend the extra $15 per kit for full-extension, ball-bearing hardware. I learned that lesson after watching cheap slides bend and bind under a client’s cookware collection.
Tame Chaotic Drawers With Dividers
A cluttered utility drawer usually just needs proper boundaries. Expandable bamboo cutlery trays ($15 to $35) or adjustable modular bins ($10 to $30) immediately keep spatulas, peelers, and measuring spoons from tangling together. If you have deep drawers, look for tiered inserts that stack a sliding top tray over a lower compartment, effectively doubling your footprint. For spice storage, an angled rack or tiered insert ($20 to $45) lets you read every jar label at a glance instead of pulling bottles out one by one.
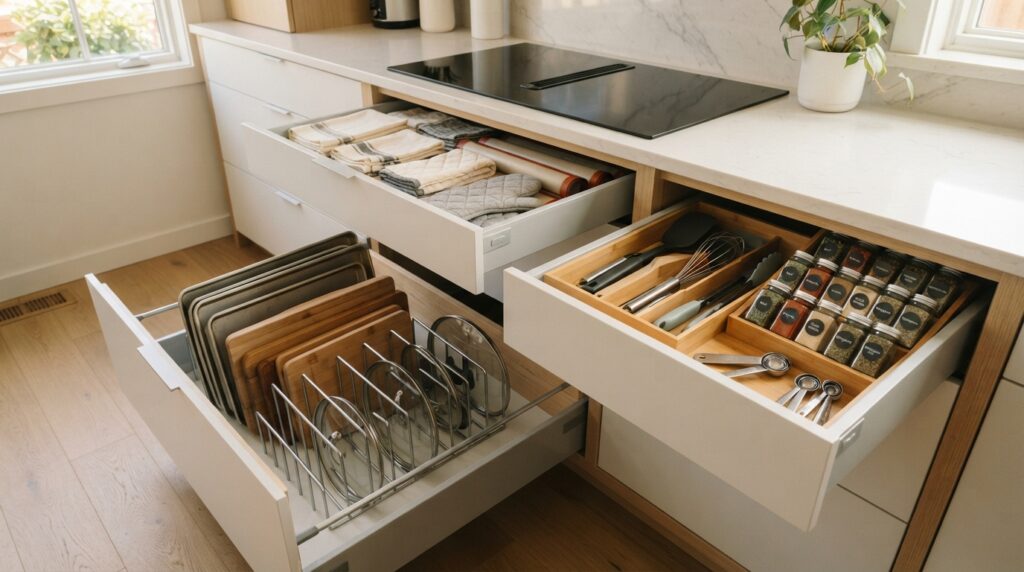
Vertical pan dividers ($20 to $50) are easily my favorite upgrade for deep base drawers. Standing cutting boards, baking sheets, and pot lids upright turns a frustrating pile into a neat file system where you can pull out a single sheet pan without unstacking five others. I have set up vertical lid drawers in several client kitchens, and almost everyone tells me that one drawer alone made the entire project worthwhile.
Pay special attention to shallow drawers tucked right under a cooktop or wall oven. Heat from appliances can warm up the inside of nearby cabinets, so avoid storing chocolate, soft butter spreads, or delicate spices right next to a hot oven cavity. That space works much better for silicone baking mats, oven mitts, or spare dish towels that do not mind a little warmth.
Turn Cabinet Doors Into Extra Storage
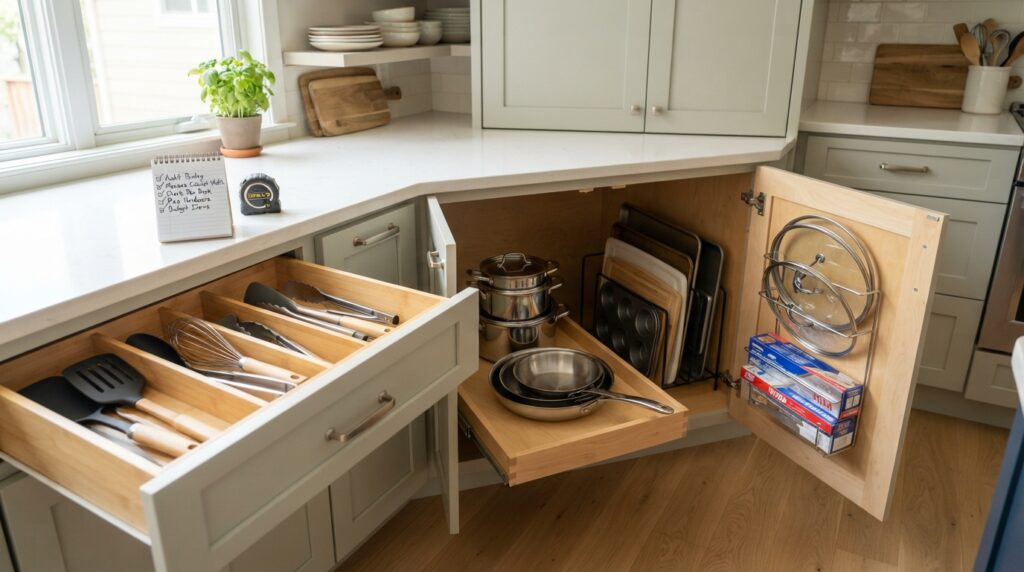
The inside of a cabinet door is free vertical real estate that most people ignore. Slim door-mounted racks cost very little and immediately clear up shelf space inside the box. A simple lid rack ($15 to $30) keeps pot lids from sliding around, while a narrow spice rack ($20 to $40) can free up an entire upper pantry shelf. You can also mount slim slots for cutting boards ($15 to $25) so they dry upright, or screw in a wire holder ($10 to $20) to get bulky foil and plastic wrap boxes off your countertops.
If you rent your home, over-the-door hooks require zero drilling. Heavy-duty adhesive racks also hold up well when installed on clean, degreased wood, provided you keep the load light. Stick to spices, wraps, and lightweight lids on your doors so the extra weight does not pull the cabinet hinges out of alignment over time.
Solve Blind and L-Shaped Corner Cabinets
Corner cabinets waste more space than any other part of a kitchen because reaching the back requires contorting your arm around a narrow frame. Instead of leaving the back half empty, fit the space with rotating or articulated hardware.
A classic two-tier lazy Susan costs $40 to $120 and solves roughly 80 percent of the frustration in an L-shaped corner cabinet. For deep blind corners where one cabinet tucks behind another, a pull-out swing tray unit ($200 to $500) brings the entire back shelf out into the room. Diagonal corner drawers ($300 to $700) are another great option, though they generally require a full cabinet remodel. Keep everyday mixing bowls, cooking oils, or small appliances on your corner trays so they spin straight to the front, and reserve high, hard-to-reach corners for seasonal platters.
Use Vertical Gaps and Above-Cabinet Space
Most kitchens leave at least 12 inches of empty air above the upper cabinets, alongside wasted vertical gaps between interior shelves. Freestanding wire or acrylic shelf risers ($10 to $25 each) let you claim that interior height in ten seconds with zero tools. Slipping a riser under your coffee mugs or everyday plates creates two neat rows instead of one precarious stack.
If you group canned goods or jars on a shelf riser, keep the labels facing forward and group similar heights together so tall bottles do not block the view behind them. When everything is visible at eye level, you stop buying a third jar of cumin or another can of diced tomatoes just because you could not see the one hiding in the back.
Up above the cabinets, woven baskets or lidded bins give you a clean place to store lightweight items you only reach for occasionally, such as extra paper towels, holiday serving dishes, or a bulky air fryer. Matching baskets keep dust off your gear and make the top of the cabinetry look tidy and intentional.
Keep the Under-Sink Cabinet Dry and Organized
The cabinet beneath the kitchen sink has to work around drainpipes, supply lines, garbage disposals, and occasional dampness all at once, which is why standard rectangular bins rarely fit. U-shaped stackable caddy bins ($15 to $35) are molded to wrap neatly around plumbing traps, while two-tier pull-out sink organizers ($40 to $90) slide smoothly past the pipes. For a $5 quick fix, wedge a standard tension rod near the top of the cabinet and hang your spray cleaners by their triggers, leaving the floor completely open for dish soap and sponges.
Avoid putting raw wood, cardboard, or particleboard organizers under the sink. Even a minor drip or slow condensation will eventually make wood swell and warp. Stick strictly to coated wire or heavy-duty plastic; I learned that firsthand after watching a client’s wooden under-sink tray swell shut within a year.
Where to Spend Your Budget First
If you are tackling your kitchen in stages, start with the upgrades that deliver the biggest daily relief for the lowest cost:
| Upgrade Step | Estimated Cost | Effort Level | Daily Impact | Priority |
| Full declutter and interior audit | $0 | Low | High | 1 |
| Drawer dividers and vertical pan racks | $50 to $100 | Low | High | 2 |
| Pull-out shelves for lower cabinets | $150 to $350 | Medium | Very High | 3 |
| Door-mounted lid and wrap racks | $60 to $115 | Low | Medium | 4 |
| Corner cabinet hardware | $40 to $500 | Medium | High | 5 |
| Shelf risers and above-cabinet bins | $30 to $75 | Low | Medium | 6 |
Working through this table from top to bottom prevents you from wasting money, because you will see exactly what you own before buying a single piece of hardware.
Mistakes That Waste Money
Over the years, I have seen plenty of homeowners spend hundreds of dollars on storage trends that photograph well but fail during a busy weeknight dinner. Custom-built wooden drawer inserts rarely justify their price tag when adjustable retrofit kits deliver 90 percent of the function for a third of the cost. Matching sets of clear designer canisters also create unnecessary work if you end up decanting half-empty bags of flour into containers that do not fit your shelf height properly.
Skip single-purpose gadget holders that gather dust the moment your cooking habits change, and never buy bins before you declutter. Paying to organize items you should have donated is the fastest way to blow your budget.
Putting Your Plan Into Action
Successful kitchen organization comes down to visibility, easy reach, and honesty about what you actually use each week. Empty the cabinets first, install pull-out shelves where heavy pots get buried, divide the drawers you open ten times a day, and mount slim racks on the doors. Leave the corner cabinets for last, since they matter much less once the rest of your kitchen flows smoothly.
Follow that sequence and a few hundred dollars will make your existing cabinets feel like a brand-new kitchen. Which cabinet or drawer in your kitchen gives you the biggest headache right now?