
The Smartest Way to Plan a Kitchen Renovation
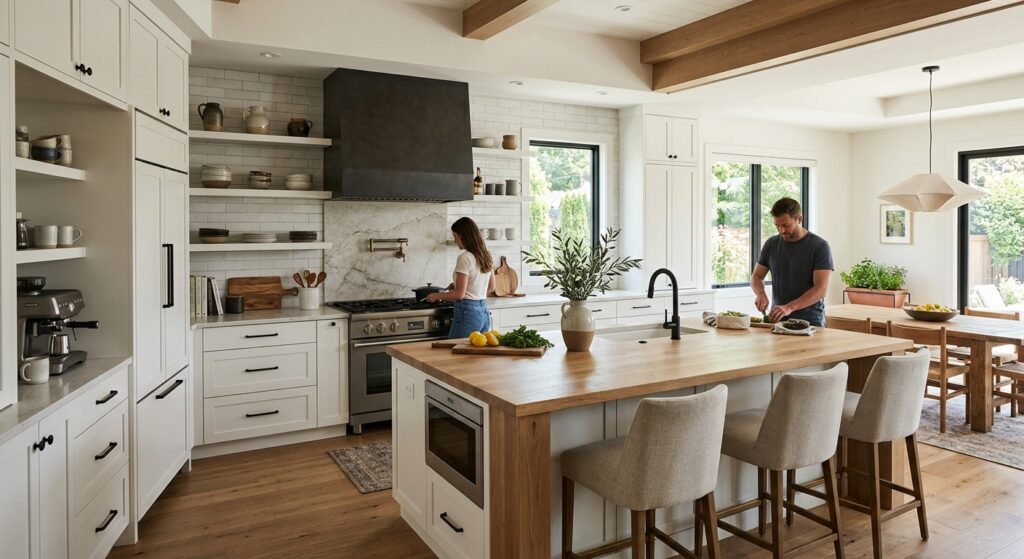
The best kitchen layout gets the workflow right first, then builds the cabinets, appliances, storage, and style around it.
That sounds simple, but many renovation decisions happen in the opposite order.
A cabinet looks beautiful on a showroom wall.
However, that same cabinet can become frustrating when a door blocks the dishwasher or an island squeezes the walkway.
So, start with the room, the movement, and the work zones.
Then bring in the finishes.
That approach gives you a kitchen that looks good without sacrificing how it actually works.
The National Kitchen & Bath Association (NKBA) Planning Guidelines provide professional guidance for kitchen planning, including activity centers, accessibility, storage, lighting, ventilation, and building systems.
Build a Strong Kitchen Layout Before Choosing Cabinets
First, measure the room accurately.
Record walls, doors, windows, openings, ceiling heights, and existing service locations.
Then, mark anything that cannot move easily.
Structural elements, plumbing, electrical systems, and ventilation can all influence the final layout.
Next, identify the main kitchen activities.
Think about refrigeration, preparation, cooking, cleanup, storage, and circulation.
The NKBA’s current fifth edition uses the Center Concept, which organizes kitchens around activity zones, work areas, and specific tasks.
That gives you a more flexible starting point than simply arranging cabinets around a traditional triangle.
When I test a kitchen plan, I would start with movement before finishes.
That means drawing appliance openings, walking routes, and preparation areas before worrying about cabinet colors.
| Planning priority | What to check | Why it matters |
|---|---|---|
| Circulation | Walkways and work aisles | Prevents cramped movement |
| Preparation | Counter space near key zones | Protects usable workspace |
| Appliances | Doors, openings, landing areas | Reduces conflicts |
| Storage | Access and location | Keeps workflow practical |
A good layout should make the next movement feel obvious.
You should not need to think about where to stand, turn, open, or place something.
Choose the Right Kitchen Layout for the Room
Once the room is measured, choose the configuration.
The common options include galley, L-shaped, U-shaped, one-wall, and island layouts.
None is automatically better.
Instead, each creates different opportunities and constraints.
Galley Kitchens: Compact, Focused, And Efficient
A galley kitchen places cabinets and appliances along opposing walls.
Because the arrangement is concentrated, the central aisle becomes critical.
NKBA guidance recommends a 42-inch work aisle for one cook and 48 inches for multiple cooks. NKBA Kitchen Planning Guidelines
The same guidance recommends a 36-inch minimum walkway.
These are planning recommendations rather than universal building-code requirements.
Therefore, local regulations still need to be checked before construction.
L-Shaped Kitchens: Flexible, Open, And Versatile
An L-shaped kitchen uses two connected walls.
As a result, it can create a natural work area while leaving more open floor space.
That flexibility can be useful when the kitchen also needs dining or circulation space.
However, protect the preparation area.
A beautiful corner arrangement becomes less useful when the main counter disappears between appliances.
U-Shaped Kitchens: Powerful, Spacious, And Practical
A U-shaped kitchen surrounds the main working area with three cabinet runs.
Consequently, it can create plenty of storage and counter space.
The trade-off is the central clearance.
If the opposing cabinet runs sit too close together, the kitchen can feel restrictive.
So, test the aisle carefully before approving the design.
One-Wall Kitchens: Clean, Minimal, And Deliberate
A one-wall kitchen keeps the major functions along one continuous run.
Because every function shares the same line, sequencing matters.
Place the refrigerator, preparation area, cooking surface, and cleanup zone with intention.
Then, make storage work vertically without overwhelming the wall.
Island Kitchens: Striking, Social, And Functional
An island can become the visual center of a kitchen.
However, it should earn that position through useful space rather than appearance alone.
Draw the island at its exact proposed size.
Then, draw appliance doors and walking paths around it.
That quick test can reveal whether the island improves the room or simply occupies it.
Create a Smarter Workflow Around Activity Centers
A kitchen works best when related tasks sit close together.
The latest NKBA guidelines specifically emphasize activity zones and work areas within defined centers.
So, instead of thinking only about a triangle, think about connected tasks.
Refrigeration should relate sensibly to food preparation.
Preparation should connect naturally with cooking.
Cleanup should remain close to the sink and dishwasher.
Storage should support each area without creating obstacles.
| Activity center | Useful nearby elements | Main objective |
|---|---|---|
| Refrigeration | Food storage and landing space | Easy access |
| Preparation | Sink and counter | Clear workspace |
| Cooking | Cooktop and cookware | Direct access |
| Cleanup | Sink and dishwasher | Smooth sequence |
| Storage | Drawers and cabinets | Quick retrieval |
The first time I sketch a layout, I would place the major appliances before the cabinets.
That small change makes the drawing feel much more like a working kitchen.
Then, cabinet sizes become solutions rather than starting assumptions.
Protect Appliance Landing Space
Appliances need room around them.
Otherwise, the kitchen may technically fit every appliance while still feeling awkward.
For refrigerators, NKBA guidance recommends at least 15 inches of landing area in specified configurations. NKBA refrigerator guideline
Cooking surfaces also need landing space.
NKBA guidance recommends 12 inches on one side and 15 inches on the other in its cooking-surface planning guideline. NKBA cooking-surface guideline
Those figures should still be checked against the specific appliance installation instructions.
| Appliance area | NKBA planning reference | Final check |
|---|---|---|
| Refrigerator | 15-inch landing area in specified configurations | Manufacturer instructions |
| Cooking surface | 12-inch and 15-inch landing areas | Manufacturer instructions |
| Single-cook work aisle | 42 inches | Project requirements |
| Multiple-cook work aisle | 48 inches | Project requirements |
This is where kitchen design becomes more technical than simply choosing attractive cabinets.
You are designing space around movement, opening mechanisms, preparation, and safety.
Give the Sink Zone More Breathing Room
The sink deserves special attention because it often sits inside the preparation and cleanup workflow.
NKBA guidance recommends 24 inches of landing area on one side and 18 inches on the other for the primary sink. NKBA sink guideline
That surrounding counter becomes valuable preparation territory.
So, avoid squeezing the sink between two unrelated appliances simply because the cabinet dimensions work.
The dishwasher also needs careful positioning.
NKBA guidance recommends placing the nearest edge of the primary dishwasher within 36 inches of the nearest edge of the sink. NKBA dishwasher guideline
Then, check the dishwasher door against nearby cabinets and circulation.
Design Storage Around How the Kitchen Moves
Storage should support the workflow.
It should not simply fill every available wall.
Start with frequently accessed items.
Then, place them close to the areas where they are used.
Drawers can make frequently accessed items easier to reach.
Tall storage, meanwhile, needs more scrutiny because it can interrupt important work areas.
NKBA planning guidance advises against separating two primary work centers with a full-height, full-depth obstacle such as a tall pantry or refrigerator. NKBA Planning Guidelines
That is a small detail with a major design implication.
| Storage decision | Question to ask |
|---|---|
| Base cabinets | What needs easy access? |
| Drawers | Which items need quick retrieval? |
| Tall cabinets | Could they interrupt a work center? |
| Pantry | Will the door affect circulation? |
I would also test cabinet doors at full opening.
A plan can look perfect when everything is closed.
It can look very different once drawers, pantry doors, and appliances are actually open.
Build Safety Into the Layout From Day One
Safety should influence the layout before construction starts.
For example, appliance placement needs to account for opening clearances and nearby movement.
NKBA safety guidance also advises considering traffic flow and avoiding arrangements that interfere with cooking activity.
Cooking appliances require particular care.
Always follow the manufacturer’s installation requirements for clearances, ventilation, electrical connections, and surrounding materials.
Local building requirements also matter.
That distinction is crucial because a design recommendation does not automatically replace a legal requirement.
When I review a kitchen concept, I would separate three things clearly:
- Design preference.
- Professional planning guidance.
- Applicable code or manufacturer requirement.
That keeps the renovation conversation grounded in facts.
Avoid Expensive Kitchen Layout Mistakes
The easiest time to discover a layout problem is before ordering materials.
So, test the design while it is still a drawing.
Draw every appliance door.
Mark the primary walking routes.
Then, check every major work aisle.
Next, mark the preparation and landing areas.
Finally, compare the proposed arrangement with appliance installation documents.
This process is not glamorous.
It is, however, much cheaper than discovering a clearance problem after cabinets arrive.
A practical layout review should check:
- Appliance door swings.
- Cabinet and drawer openings.
- Primary circulation.
- Work-aisle dimensions.
- Landing areas.
- Preparation space.
- Tall storage placement.
- Plumbing and electrical locations.
That sequence gives you a much clearer picture before demolition begins.
Turn the Design Into a Clear Renovation Brief
Before requesting final pricing, document the decisions.
Record the verified room dimensions.
Add appliance models and their installation requirements.
Then, document the proposed layout and major storage decisions.
Also, separate confirmed choices from unresolved questions.
That gives your contractor or designer a cleaner starting point.
| Brief section | What to record |
|---|---|
| Room | Verified dimensions and openings |
| Appliances | Exact models and specifications |
| Layout | Selected configuration |
| Services | Plumbing, electrical, ventilation |
| Storage | Cabinet priorities |
| Finishes | Countertops, fronts, flooring, hardware |
My preferred approach is simple: settle function before decoration.
A cabinet finish can change.
A poorly positioned appliance or service connection is much harder to rethink later.
Treat Measurements as Guardrails, Not Magic Numbers
Kitchen dimensions often appear online as universal rules.
That can be misleading.
The NKBA guidelines are professional planning recommendations, while local codes determine applicable legal requirements.
So, use published measurements as design benchmarks.
Then, verify the requirements for the actual project.
| Planning point | Published NKBA reference | What to verify |
|---|---|---|
| Single-cook work aisle | 42 inches | Project conditions |
| Multiple-cook work aisle | 48 inches | Project conditions |
| Walkway | 36 inches | Local requirements |
| Refrigerator landing | 15 inches in specified configurations | Appliance requirements |
This distinction also makes renovation advice more trustworthy.
There is no benefit in presenting a recommendation as code when the source does not say that.
Finish With a Layout That Feels Effortless
The best kitchen layouts usually feel simple.
The refrigerator opens without blocking a critical route.
Preparation has enough usable counter space.
Cooking has landing space nearby.
Cleanup follows a sensible sequence.
Storage remains accessible.
Movement feels natural.
That is the real test.
Ignore the backsplash for a moment.
Ignore the cabinet color too.
Instead, imagine every relevant door and drawer opening at the same time.
Then ask one question:
Does the kitchen still work?
If the answer is yes, the layout is doing its job.
Use This Final Kitchen Layout Checklist
Before approving the renovation plan, verify the following:
- Work aisles have been checked against the chosen planning guidance.
- Main walkways remain practical.
- Appliance doors do not create conflicts.
- Refrigerator landing space has been considered.
- Cooking landing space has been considered.
- The sink has useful surrounding counter space.
- Dishwasher placement works with the sink.
- Tall storage does not interrupt key work centers.
- Appliance installation documents have been reviewed.
- Plumbing, electrical, ventilation, and structural conditions are coordinated.
- Local requirements have been checked by the appropriate professional.
Build the Layout Before the Dream Kitchen
A successful kitchen renovation starts with the floor plan.
First, protect circulation.
Then, connect the major activity centers.
Afterward, reserve preparation, landing, and storage space.
Next, coordinate appliances and services.
Finally, verify the design against manufacturer instructions and applicable requirements.
The result does not need to be complicated.
It simply needs to work.
That is the difference between a kitchen that photographs beautifully and one that feels right every morning.
And when the layout is solved before the finishes arrive, the renovation becomes easier to control, price, and build.